I’m sure you’ve experienced that finding a perfect lip shade that matches our taste, skin tone and attire is not an easy job. It gets tougher when the color is Pink. I’m so happy that L’Oreal Paris thought about the fact and created La Vie En Rose Lipstick range, which offers 13 shades of pink lipsticks with the message that there’s a ‘Pink’ for every skin tone. L’Oreal Paris La Vie En Rose (Life is Pink) lipstick is an exclusive range of celebrity endorsement showing how those gorgeous ladies choose their perfect pink according to their taste. However, I’ve noticed that according to the geo-location there is a variation in the exclusive ambassador shades; eg. Loreal Paris India has Sonam and Katrina, Loreal Paris USA has Zoe and Frieda.
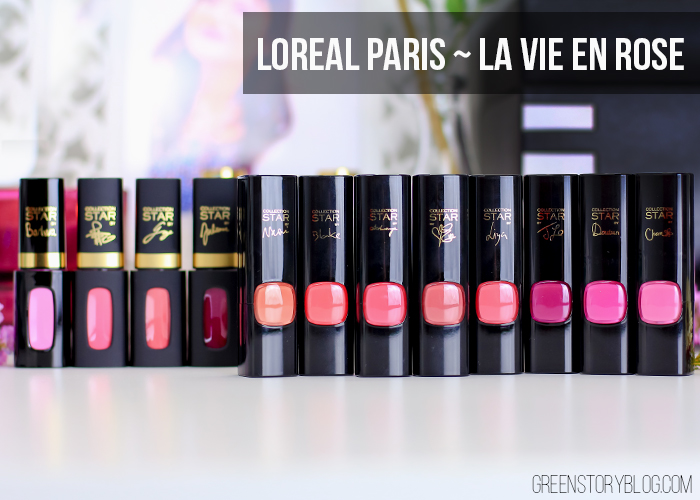
I find it amazing that within this range of 13 pink shade you’ll find from an almost clear pink gloss to deep berry-ish shade. The collection Star Moist Mattes aren’t wholly matte but aims to meet everyone’s expectation, even if you are a fan of creamy or a non-glossy matte lipstick.
I’ve 12 shades from the La Vie En Rose collection here with me and the past couple of weeks I’ve been all about ‘Pink’ so that I can assist you guys choosing the perfect pink lipstick shade. Without further blabbering, I want to tell you about them and show you how they swatch.
Loreal Paris La Vie En Rose – Moist Matte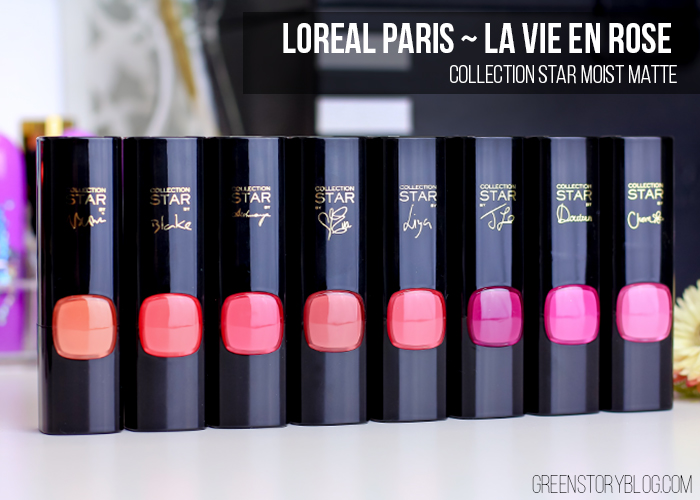
There are 9 shades of pink in La Vie En Rose Moist Matte Collection as followed…
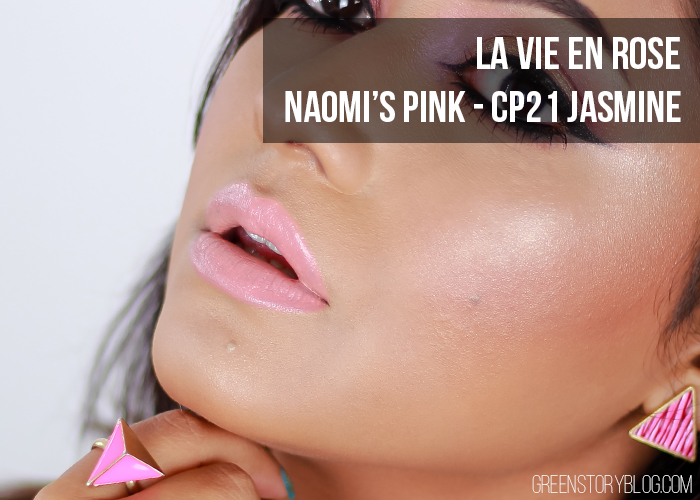
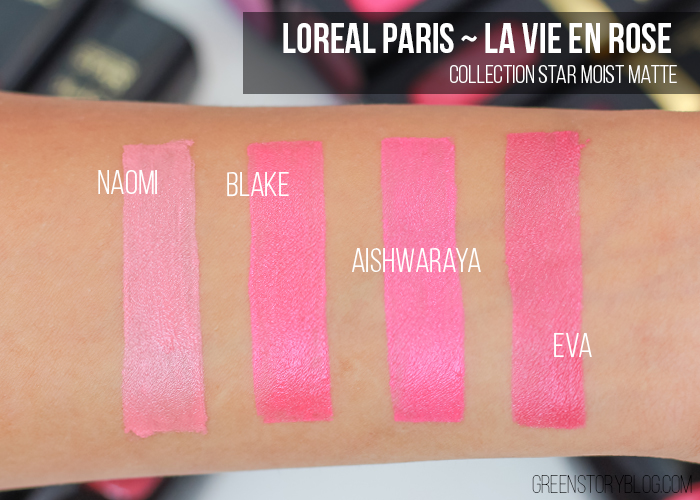
- Naomi Watts – CP21 Jasmine
– a peachy nude pink - Blake Lively – CP24 primrose
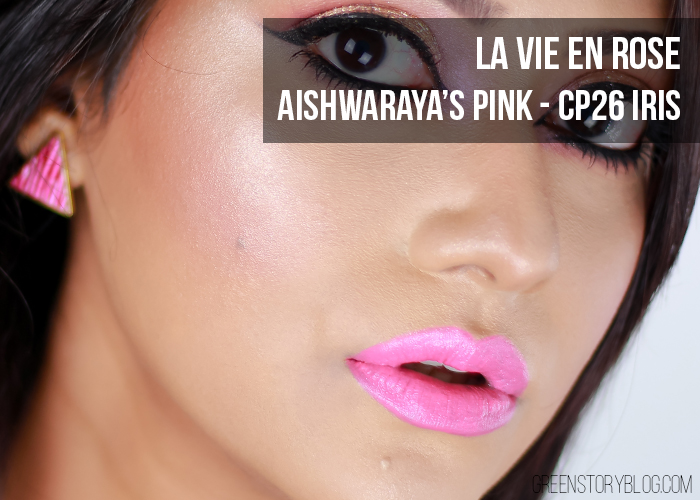
– a soft coral pink - Aishwarya Rai – CP26 Iris
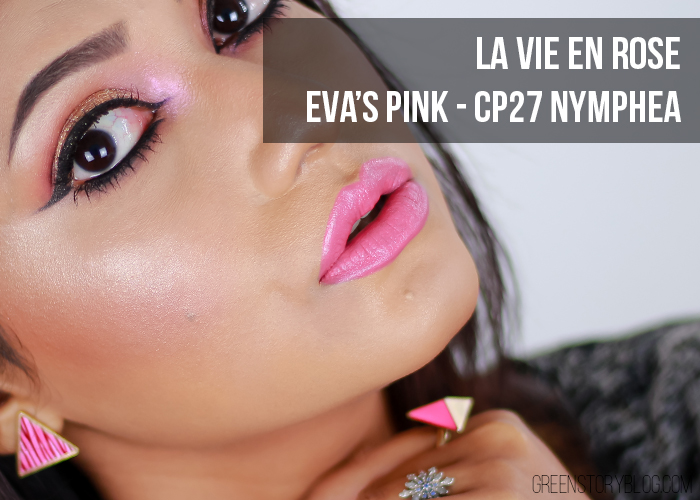
– bright pink with warm tone - Eva Longoria – CP27 Nymphea
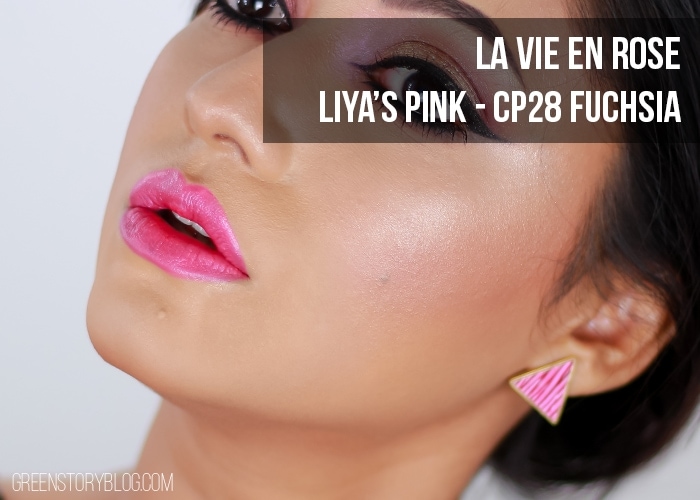
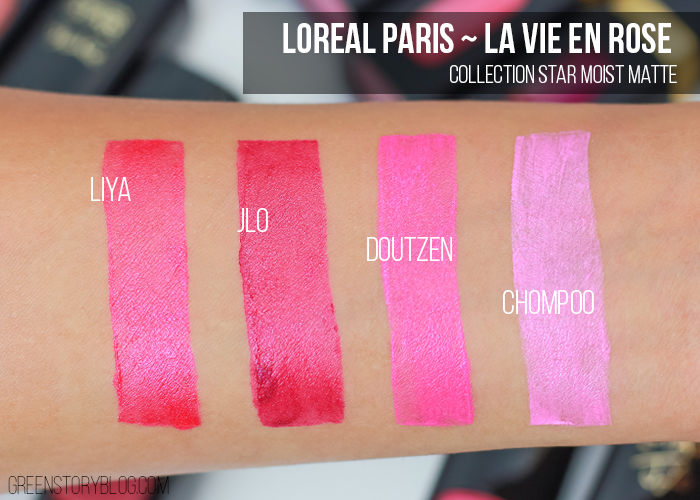
– a soft mauve pink - Liya Kebede – CP28 Fuchsia
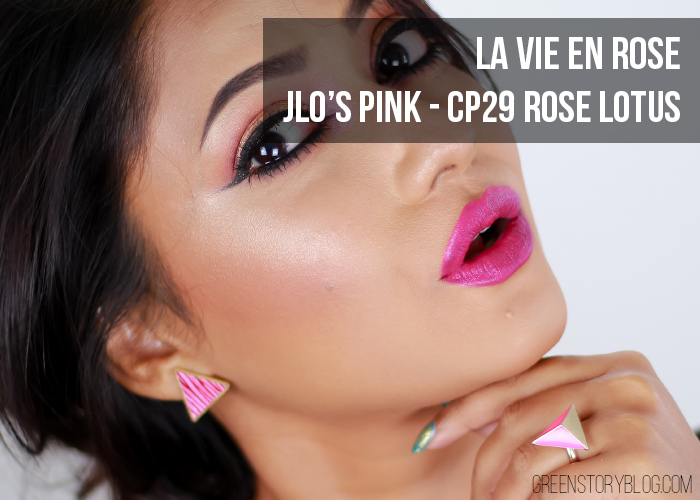
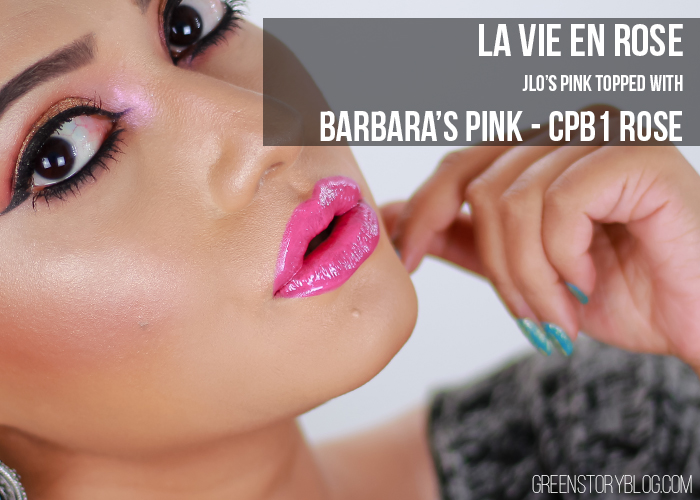
– a true Fuchsia Pink - Jenefer Lopez – CP29 Rose Lotus
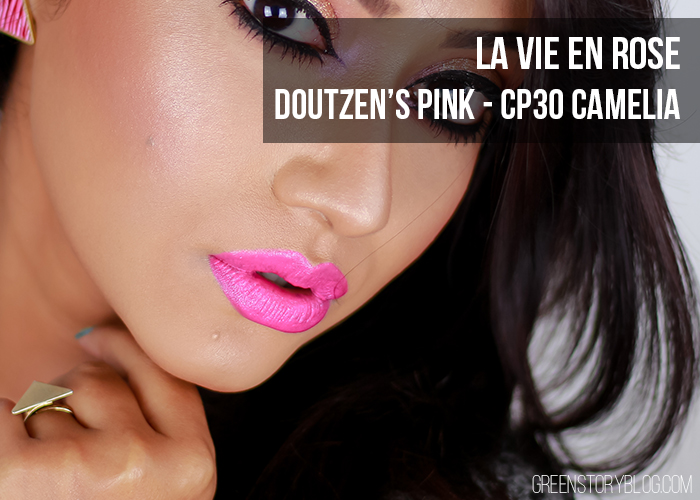
– a deeper tone of Fuchsia with a blue undertone - Doutzen Kroes – CP30 Camelia
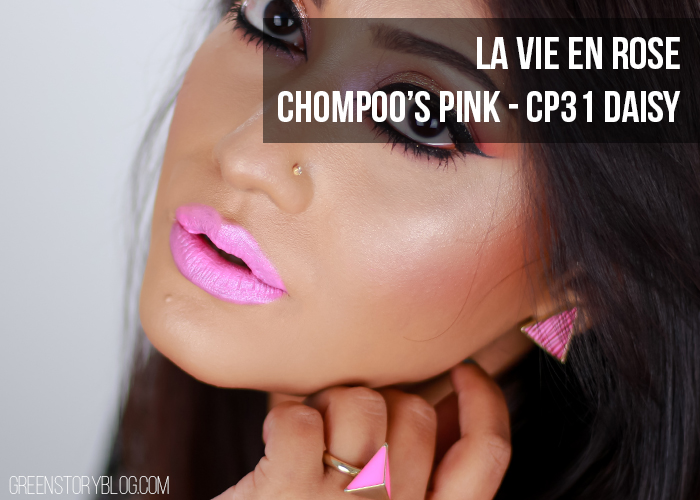
– a neon tone of lavender pink - Chompoo Araya – CP31 Daisy
– almost pastel barbie pink - Barbara Pavlin – CP32 RoseMary
– mistakenly, I haven’t got this particular shade so can’t explain about this one.
My experience with these Loreal Lipsticks:
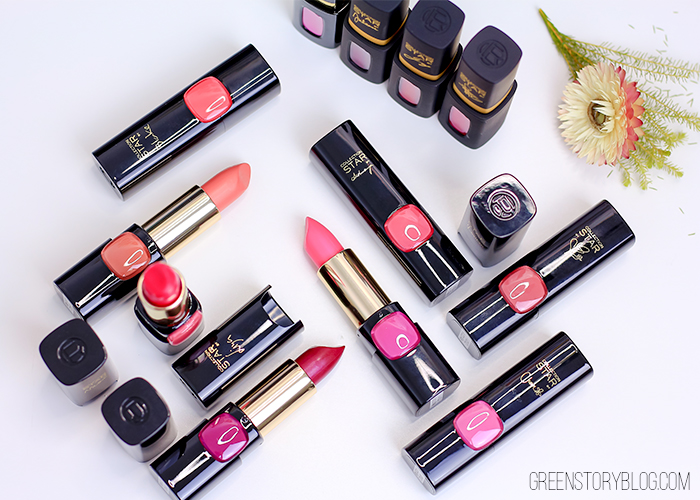
I love the packaging, of course, they are nice and sleek with a 4.2g of lipstick bullet. That button-like color display on the packaging somewhat helps to determine the color without opening the lid. Although the color display isn’t true to the actual lipstick shade.
La Vie En Rose Moist Matte lipsticks are waxier in texture rather creamier. I can relate the claim being moist-matte as they’re not overly matte, to be more precise they are semi-matte in the finish. Lighter shades like Naomi and Chompoo apply patchy on my lips due to their waxiness, deeper shades apply nicely and evenly. They are quite comfortable on lips as well and doesn’t make lips dry. Deeper color leaves a stain and lighter ones don’t. They last a good amount of time (3/4 hours) on lip only if you don’t eat/drink or keep your lips untouched. Otherwise, they transfer just like any other typical lipstick.
My nose failed to detect any scent in these lipsticks so I believe they’ve no fragrance in them. These lipsticks are mainly sheer-medium in opacity, in one swipe they don’t give the full-color form. For fuller coverage, I needed to apply two to three layer. Those, who have a natural pink lip and love is gonna love the finish of this Loreal Paris La Vie En Rose Moist Matte lipstick range.
My favorites from this range are Blake, Eva, Liya & JLO.
Swatch of them on my lip and hand are below…

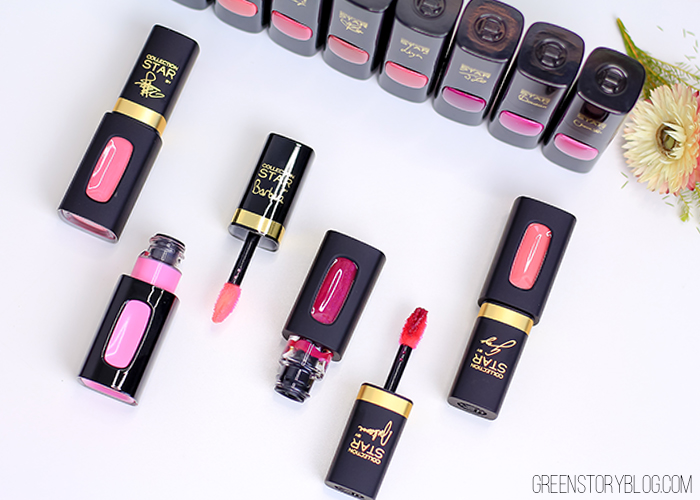
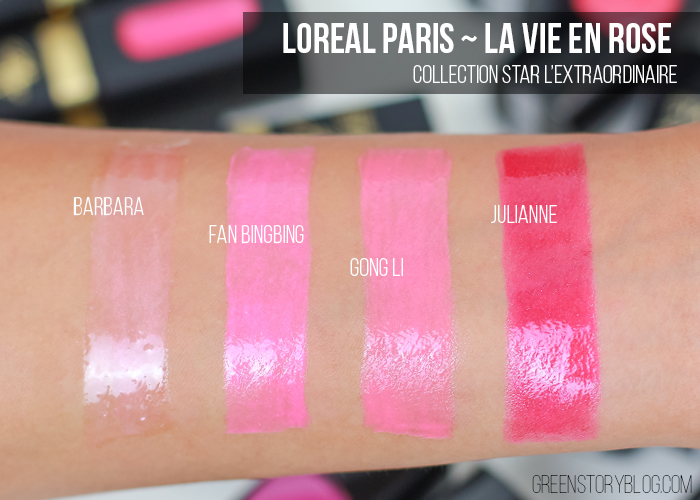
Loreal Paris La Vie En Rose – L’extraordinaire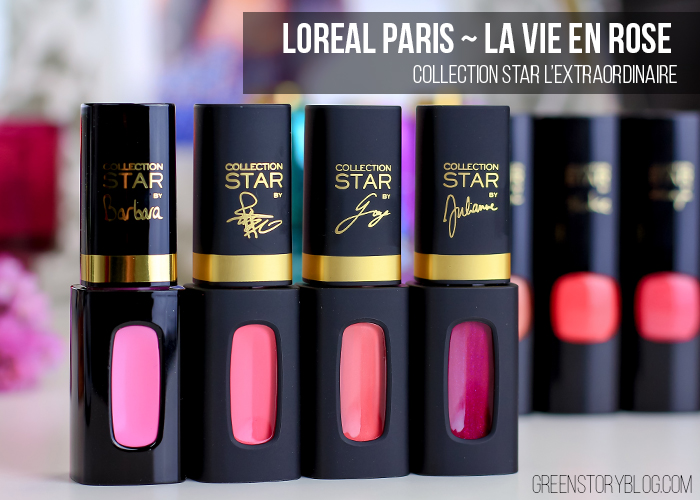
L’extraordinaire range of La Vie En Rose is mainly some luscious glosses. There are 4 shades in this range as followed…
- Barbara Pavlin – CPB1 Rose
– this is almost clear in color, there is just a hint of pink - Fan Bing Bing – CPM6 Peony
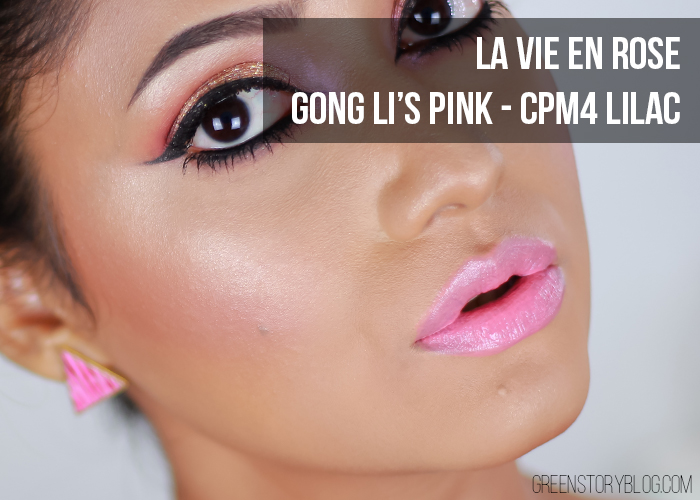
– it’s more of a pastel pink - Gong Li – CPM4 Lilac
– close to Fan’s pink but with a blue/lilac undertone - Julianne Moore – CPM12 Magnolia
– this one is a rich berry pink
My experience:
Again some elegant packaging with 4.2g of product, love it. Only Barbara has a shiny packaging because the finish of the gloss is also shiny, the other three has a matte finish in the packaging. The doe foot applicator is also great in quality. These glosses are very hydrating on lips, not sticky but very smooth. They have a mild scent, something sweet yet there is a zing (I’m bad at describing fragrance) but very mild.
Mattes are not as glossy as the glossy one, Barabara, is. They’re nicely pigmented, thus can be worn alone for a sheer touch or as a topper to achieve a dimensional pout. I’m sure lip gloss lovers are gonna love these La Vie En Rose L’extraordinaire rage.
Swatch of them on my lip and hand are below… as Barbara is a clear shade I wore is as a topper.


This new range of La Vie En Rose is created to offer every woman her tailor-made pink, each inspired by one of the brand’s spokespeople and composed by its color designer Eva Yean.
If you ask me which one I find as #MyOneTruePink in this range then it has to be Eva Longoria’s pink (CP27 Nymphea). I’m truly obsessed with this shade, goes amazingly with my tawny skin and my color taste. As because Eva isn’t much bright I can rock this one any time of the day as well.
So which one you think is the best match for you? Have you tried these lipsticks yet?
[color-box]
Shopping Info:
- Collection Star Moist Matte La Vie En Rose Lipstick – RM 38.05
- Collection Star L’Extraordinaire La Vie En Rose Lipstick – RM 42.30
Available at any pharmacies; eg. Guardian and Watson etc. You can also get them online at Hermo MY.
[/color-box]
*** PR Sample.


![Mamonde | A new K-Beauty Brand Blooming in Malaysia | Giveaway [CLOSED]](https://greenstoryblog.com/wp-content/uploads/2016/05/Mamonde-A-flower-inspired-brand-1-of-6-1-768x768.jpg "Mamonde | A new K-Beauty Brand Blooming in Malaysia | Giveaway [CLOSED]")